
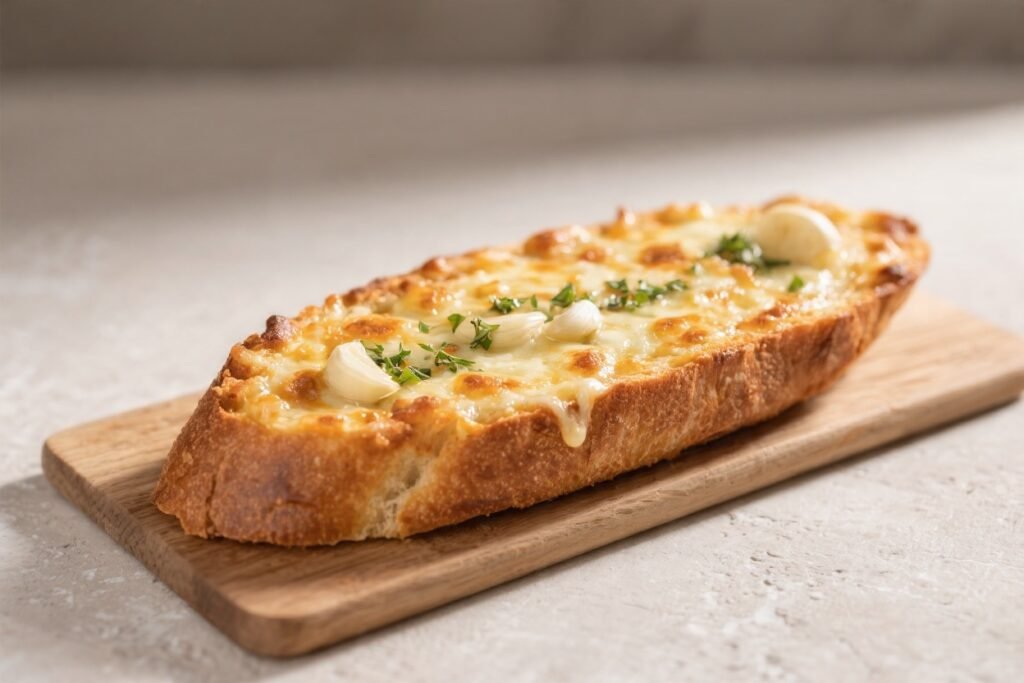
Garlic bread is one of those cozy, can’t-skip sides that makes any meal feel complete. This cheesy keto version brings all the buttery, garlicky joy without the heavy carbs. It’s crisp at the edges, soft in the center, and loaded with melty cheese.
You’ll get the familiar pull-apart feel with a clean, simple ingredient list. Whether you’re pairing it with soup, salad, or a weeknight pasta alternative, this is the kind of recipe you’ll reach for again and again.

Cheesy Keto Garlic Bread - Low-Carb, But Full of Comfort
Ingredients
- 2 cups shredded low-moisture mozzarella (divided: 1 1/2 cups for the dough, 1/2 cup for topping)
- 2 oz cream cheese, softened
- 1 large egg
- 3/4 cup fine almond flour (blanched works best)
- 1/2 tsp baking powder
- 1/2 tsp kosher salt
- 1/2 tsp garlic powder
- 2–3 cloves fresh garlic, minced
- 2 tbsp unsalted butter, melted
- 1 tbsp olive oil (optional, for brushing)
- 2 tbsp grated Parmesan
- 1–2 tbsp chopped fresh parsley (or 1 tsp dried)
- Red pepper flakes (optional, for a little heat)
Instructions
- Preheat the oven to 400°F (200°C). Line a baking sheet with parchment paper. Lightly grease the parchment so the dough won’t stick.
- Make the garlic butter. In a small bowl, mix melted butter, minced garlic, and half the parsley. Set aside to let the flavors bloom.
- Melt the cheeses. In a microwave-safe bowl, combine 1 1/2 cups mozzarella and cream cheese. Microwave in 20–30 second bursts, stirring between each, until smooth and stretchy. You can also do this gently on the stovetop over low heat.
- Mix the dry ingredients. In a separate bowl, whisk almond flour, baking powder, salt, and garlic powder.
- Form the dough. Add the dry mixture and egg to the melted cheese. Stir vigorously with a spatula until it forms a cohesive dough. If it’s sticky, wet your hands or let it sit for 2–3 minutes to firm up.
- Shape the crust. Place the dough on the prepared baking sheet. Press it out into an oval or rectangle about 1/4 inch thick. Keep the thickness even for consistent baking.
- Par-bake. Bake for 8–10 minutes until the surface looks set and just starting to turn light golden at the edges.
- Add the flavor. Brush the par-baked crust with the garlic butter. Sprinkle over the remaining 1/2 cup mozzarella and the Parmesan. Drizzle with olive oil if using.
- Bake again. Return to the oven for 6–8 minutes, until the cheese is melted and bubbling.
- Broil for color (optional but recommended). Switch to broil for 1–2 minutes to brown the top. Watch closely—brown is good, burnt is not.
- Finish and slice. Sprinkle with the remaining parsley and a pinch of red pepper flakes. Let it rest for 3–4 minutes, then slice into strips or wedges. Serve warm.
What Makes This Special

This isn’t a “close enough” low-carb swap—it actually tastes like garlic bread. The base blends almond flour and mozzarella to mimic that classic bready bite.
A quick broil at the end adds golden, bubbly edges for the real garlic-bread look. And because it’s naturally grain-free, it works for both keto and gluten-free eaters. Best of all, you can make it in under 30 minutes with pantry-friendly ingredients.
What You’ll Need
- 2 cups shredded low-moisture mozzarella (divided: 1 1/2 cups for the dough, 1/2 cup for topping)
- 2 oz cream cheese, softened
- 1 large egg
- 3/4 cup fine almond flour (blanched works best)
- 1/2 tsp baking powder
- 1/2 tsp kosher salt
- 1/2 tsp garlic powder
- 2–3 cloves fresh garlic, minced
- 2 tbsp unsalted butter, melted
- 1 tbsp olive oil (optional, for brushing)
- 2 tbsp grated Parmesan
- 1–2 tbsp chopped fresh parsley (or 1 tsp dried)
- Red pepper flakes (optional, for a little heat)
Instructions

- Preheat the oven to 400°F (200°C).
Line a baking sheet with parchment paper. Lightly grease the parchment so the dough won’t stick.
- Make the garlic butter. In a small bowl, mix melted butter, minced garlic, and half the parsley.
Set aside to let the flavors bloom.
- Melt the cheeses. In a microwave-safe bowl, combine 1 1/2 cups mozzarella and cream cheese. Microwave in 20–30 second bursts, stirring between each, until smooth and stretchy.
You can also do this gently on the stovetop over low heat.
- Mix the dry ingredients. In a separate bowl, whisk almond flour, baking powder, salt, and garlic powder.
- Form the dough. Add the dry mixture and egg to the melted cheese.
Stir vigorously with a spatula until it forms a cohesive dough. If it’s sticky, wet your hands or let it sit for 2–3 minutes to firm up.
- Shape the crust. Place the dough on the prepared baking sheet.
Press it out into an oval or rectangle about 1/4 inch thick. Keep the thickness even for consistent baking.
- Par-bake. Bake for 8–10 minutes until the surface looks set and just starting to turn light golden at the edges.
- Add the flavor.
Brush the par-baked crust with the garlic butter. Sprinkle over the remaining 1/2 cup mozzarella and the Parmesan. Drizzle with olive oil if using.
- Bake again.
Return to the oven for 6–8 minutes, until the cheese is melted and bubbling.
- Broil for color (optional but recommended). Switch to broil for 1–2 minutes to brown the top. Watch closely—brown is good, burnt is not.
- Finish and slice.
Sprinkle with the remaining parsley and a pinch of red pepper flakes. Let it rest for 3–4 minutes, then slice into strips or wedges. Serve warm.
Keeping It Fresh
This bread is best right out of the oven, when the edges are crisp and the center is soft.
If you have leftovers, store them in an airtight container in the fridge for up to 3 days. Reheat in a 350°F (175°C) oven or air fryer for 5–7 minutes to restore the crisp edges. Avoid microwaving—it makes the cheese rubbery.
For longer storage, freeze slices between parchment layers and reheat from frozen.
Why This is Good for You
- Low in carbs: Almond flour and cheese keep the net carbs down, making it a smart fit for keto and low-carb eating.
- Higher in protein and fat: Helps you stay satisfied and reduces the urge to snack on refined carbs.
- Gluten-free: Naturally grain-free without relying on processed substitutes.
- Garlic and herbs: Adds flavor without sugar and brings antioxidants and a savory punch.
Pitfalls to Watch Out For
- Dough too sticky: Slight stickiness is normal. Lightly oil your hands or chill the dough for 5 minutes to make shaping easier.
- Uneven thickness: Thin spots burn fast. Press the dough evenly—use a piece of parchment on top and a rolling pin if you like.
- Greasy result: Too much added oil or extra cheese can make it greasy.
Stick to the amounts listed, and blot lightly with a paper towel after baking if needed.
- Soggy center: Par-bake before adding toppings, and let it rest a few minutes before slicing.
- Burning under the broiler: Broil briefly and watch it the entire time. It can go from golden to charred in seconds.
Alternatives
- Coconut flour version: Swap in 1/4 cup coconut flour for the almond flour and add an extra egg to balance dryness. Texture will be a bit more bread-like but spongier.
- Dairy-light option: Use part-skim mozzarella and reduce the topping cheese by one-third.
Flavor stays strong with the garlic butter and Parmesan.
- Herb blend: Add 1 tsp Italian seasoning or 1/2 tsp dried oregano to the dough for a pizzeria vibe.
- Cheese swap: Try provolone or fontina on top for a creamier melt. A little asiago or pecorino adds sharpness.
- Garlic lovers: Roast a head of garlic, mash the cloves, and mix into the butter for a sweeter, mellow garlic note.
- Spicy kick: Add crushed red pepper into the dough and on top for gentle heat.
- Dipping sauces: Serve with warm marinara, pesto, or a lemony garlic aioli to change the mood.
FAQ
Can I make this without a microwave?
Yes. Melt the mozzarella and cream cheese together in a small saucepan over low heat, stirring constantly until smooth.
Take it off the heat before it starts to brown.
What if I only have pre-shredded cheese?
Pre-shredded works fine. It may not melt quite as smoothly due to anti-caking agents, but the recipe will still come together and taste great.
Is there a nut-free version?
Use coconut flour instead of almond flour and add an extra egg to keep the dough pliable. Start with 1/4 cup coconut flour and adjust slightly if the dough feels too wet or dry.
How do I keep it from sticking to the parchment?
Lightly grease your parchment with olive oil or spray.
Let the bread rest for a minute or two after baking before lifting a slice—this helps it release cleanly.
Can I prep it ahead?
You can make the dough and shape it on a parchment-lined tray. Cover and refrigerate for up to 24 hours. Bake straight from the fridge, adding 1–2 minutes to the first bake.
How many carbs are in a serving?
Exact numbers vary by brand, but a typical slice (1/8 of the recipe) often lands around 2–4g net carbs.
Check your labels for the most accurate count.
Will it taste eggy?
No. The cheese-forward dough and garlic butter mask any egg flavor. If you’re sensitive to egg taste, be sure not to overbake, which can emphasize it.
Can I use fresh mozzarella?
Skip fresh mozzarella in the dough—it releases too much moisture and makes the crust soft.
Low-moisture, part-skim mozzarella is the best choice for structure.
What’s the best way to reheat?
Use an oven or air fryer at 350°F (175°C) for a few minutes to bring back the crisp edges. Avoid the microwave if you can.
Can I double the recipe?
Yes. Bake on two sheets or in batches so the crusts brown evenly.
Don’t crowd the oven, and rotate pans halfway for even color.
Wrapping Up
Cheesy Keto Garlic Bread delivers everything you love about the classic—rich garlic butter, stretchy cheese, and golden edges—without the carb crash. It’s quick to make, easy to tweak, and pairs with almost anything. Keep the ingredients on hand, and you’ll always have a crowd-pleasing side ready to go.
One warm, fragrant tray, and it won’t last long on the table.
